Resizing Stickers in Procreate: The Busy Mom’s Guide to Sanity, Success, and Not Losing It
If you’re resizing stickers in Procreate and finding yourself whisper-screaming at your iPad, you’re not alone.
Maybe your cute doodle shrinks down to postage-stamp size out of nowhere, or it suddenly takes over the entire canvas like a toddler in a bubble bath.
Resizing stickers shouldn’t feel like defusing a bomb, but some days it really does. The good news?
With a few not-so-secret tricks, it gets easier. Promise.

You’re here because you want to have fun making cute stuff, not spend hours spiraling because things won’t fit or line up. That’s the vibe.
In this post, you’ll get step-by-step help so you can resize any sticker, keep your sanity, and maybe even feel proud of what you made.
Grab your iPad, maybe a leftover juice box, and let’s make resizing easy and maybe even fun.
Table of Contents
Understanding Sticker Resizing Basics in Procreate

Okay, let’s cut to the chase. Resizing stickers in Procreate is the lifeline for every mom juggling 47 tabs in her brain who still wants her sticker game strong.
You don’t have to be some tech wizard to scale a flower, shrink a planner box, or enlarge that llama for a wall print.
Once you get the hang of these basics, resizing stickers in Procreate is going to feel almost as easy as hiding vegetables in your kid’s mac and cheese.
Why Resize Stickers? Practical Uses for Creatives
- Planner Layouts: You drew the cutest little coffee cup, but now it’s giant. Shrink it to planner box size for your Monday spread, or make a sheet of tiny ones for every “survived the dropoff” victory. Be sure and check out 10 Creative Ways to Decorate Your Planner with Stickers for Fun and Motivation after you got your resizing in check.
- Wall Art: Got a sticker you love? Enlarge it to poster size. Suddenly, fridge art becomes living room art.
- Digital Scrapbooking: That birthday balloon sticker doesn’t need to just sit in one spot. Use the same doodle in every size: background borders, celebration banners, or tiny accent sparkles.
Flexibility is everything. Resizing means you make one thing, then use it everywhere. It’s the digital equivalent of leftovers: warm it up, dress it up, and nobody knows it didn’t just appear fresh.
🎥 Prefer to learn by watching?
I’ve got a YouTube channel full of quick, no-pressure tutorials made for tired, creative souls like you.
Subscribe here and catch your next creativity boost, one sticker at a time.
Essential Tools in Procreate for Resizing Stickers

- Transform Tool: This is sticky note gold. Tap the arrow at the top left. Your sticker is now surrounded by blue dots. Drag a corner to size up or down. Easy win.
- Snapping: Want your sticker to stay put or not get all wobbly when you resize? Turn on Snapping in the transform menu. It lines things up, kind of like bumpers at the bowling alley. Keeps your sticker on track and out of the gutter.
- Uniform Scaling: Select “Uniform” in the transform toolbar. This keeps your sticker’s proportions perfect. No squished princesses or stretched out donuts here.
I cover other helpful tools in this Procreate sticker design post. You’ll find tips, tricks, and friendly encouragement to keep your stickers looking polished without the meltdown.
How to Resize Stickers in Procreate Step by Step
Resizing stickers in Procreate shouldn’t feel like squeezing into jeans after a week of comfort food.
Once you know what to tap (and what to ignore), it’s just another swipe.
You get to stop guessing and start resizing with the kind of precision that makes you want to show off your sticker sheet.
Want even more Procreate tutorials? Be sure and take a peek at Using Layers for Stickers in Procreate (Without Losing Your Mind) and Clipping Masks For Procreate Stickers (with Less Stress and More Fun!)
Below is a simple walkthrough of the two parts most likely to trip people up, picking the right canvas and resizing correctly without summoning the tech demons.
Make Your First Sticker in Procreate
Grab your starter file, the brushes, tips, and step-by-step cheatsheets you need to design your first cute sticker today.
How to Choose the Right Canvas Size for Procreate Stickers

The sticker struggle is real, but your canvas doesn’t have to be chaos.
Before you start resizing stickers in Procreate, set yourself up with a size that just makes sense.
Open up Procreate and ignore the urge to pick the largest canvas just because it’s there. Here’s how to get it right from the start:
- 3000 x 3000 pixels is a sweet spot for most printable sticker needs. Big enough to zoom in, small enough not to crash your iPad.
- 1000 x 1000 pixels and 72 dpi for digital only stickers, that will never see a printer
- If your sticker is headed for a printable sheet, use common print sizes like 5 x 7 or 4 x 6 inches at 300 dpi. Saves you heartbreak later.
- Choose RGB color mode for digital, CMYK if you’re printing.
Want a deeper dive into canvas settings? This best canvas size for Procreate post breaks down the technical stuff step by step.
Getting your canvas right at the beginning can save you hours of resizing drama later.
How to Use the Transform Tool in Procreate to Resize Stickers

- Select the sticker
Tap the layer your sticker lives on. If it’s grouped with others, open the group or tap just that sticker. - Tap the Transform Tool
It looks like an arrow at the top left. Tap it, and your sticker will be surrounded by blue handles. - Manual Resize (Freeform) Or Uniform
Drag any corner to shrink or grow your sticker. To keep it proportional, tap “Uniform” at the bottom. Turn on “Snapping“ - Guided Resize (the calm way)
Use “Fit to Screen” or type in custom dimensions for exact size control.

Quick Tip:
If you’re resizing layers, groups, or just a part of a drawing, the method shifts slightly:
- Layers: Resize everything on that layer at once. Great for simple sticker sheets.
- Groups: Resize multiple doodles together and keep layout intact.
- Selections: Use the “S” tool to lasso just one part, then resize only that area.

If your sticker looks stretched, blurry, or weird after resizing, undo and make sure “Uniform” is selected.
The transform tool, when used right, will seriously save your time and your mood.
How to Troubleshoot Sticker Resizing Issues in Procreate
Sometimes resizing stickers in Procreate feels like folding a fitted sheet.
It looks simple, but ends in chaos. Before you rage quit or banish your iPad to the junk drawer, try these fixes.

How to Avoid Blurry or Low Quality Stickers After Resizing
Let’s break this down in mom speak: Procreate uses pixels, not magic.
Every time you stretch or shrink a sticker, you’re pulling on a digital blanket. Pull it too far and it starts to look fuzzy.
That’s called raster art. Unlike vector images (which stay sharp forever), raster images can lose quality when resized too much. Procreate doesn’t support vector, so here’s how to keep things crisp:

- Start bigger than you need
Design large and scale down. Shrinking is safe. Enlarging is risky. So if you aren't sure if your sticker will only be in the digital world, upscale. - Use 300 dpi or higher
Higher resolution = cleaner resizing. - Resize once, not five times
Constant changes can degrade the artwork. - Use “Uniform” mode
Keeps the shape intact. No squished bunnies or stretched stars. - Turn On Snapping
This keeps your sticker in place as you move it around.
Want to learn even more about various Procreate Tools for Sticker Design? Read the full post!
How to Fix Cropped or Distorted Stickers in Procreate

- Check your selection
Make sure you selected the whole sticker. Use the “S” icon and outline everything. - Check your layers
Some parts might be on different layers. Either combine them or select all at once. - Use “Uniform” transform
Keeps everything proportional. Avoid “Freeform” unless you want unexpected shapes. - Stay inside canvas boundaries
Moving art off the edge can crop it. Adjust the canvas size if needed.
Still stuck? Here’s a super handy resource from the Procreate team that covers resizing best practices.

Share, Print, or Sell Your Resized Stickers with Confidence
Resizing right means your files are ready to share or sell, no weird dimensions or blurry flops. Here’s how to prep:
- Keep artwork at 300 dpi for printing
- Export in PNG for digital use, PDF for printing
- Double check dimensions before uploading to Etsy or Instagram
Resizing stickers in Procreate is a creative shortcut that saves you stress and makes your designs more flexible, shareable, and fun.
Want even more sticker-making goodness? Grab my free Procreate Starter Kit with a sticker starter file including all the layers I used to create it, a mini brush pack, and a layer guide.
Make Your First Sticker in Procreate
Grab your starter file, the brushes, tips, and step-by-step cheatsheets you need to design your first cute sticker today.
🎥 Prefer to learn by watching?
I’ve got a YouTube channel full of quick, no-pressure tutorials made for tired, creative souls like you.
Subscribe here and catch your next creativity boost, one sticker at a time.
Got sticker dreams, funny fails, or questions? Drop a comment or message me. You are not alone in this creative mess.
Thanks for hanging out with me. I can’t wait to see what you make next.
Love and messy buns,
❤️ Cynthia McDonald
Want More Procreate
Whether you’re just starting out or ready to try your next cute design, here’s a full list of tutorials, tips, and easy wins for making stickers in Procreate:
Start Here: Beginner-Friendly Guides
- Procreate Beginner Guide for Stickers
- Making Stickers in Procreate for Beginners
- How to Design Stickers in Procreate
- How Procreate Stickers Boosted My Confidence as a Creative Mom
- How Procreate Helped Me Reconnect with Creativity
- What I Learned from Trying A Daily Sticker Sketch Challenge(and Failing Sometimes Too)
Learn Cute Sticker Drawing Techniques
- Draw a Cute Blushing Star Sticker
- Designing a Cute Bunny Sticker
- How to Draw Cute Cherries
- Draw a Cloud in Procreate (Easy!)
- Design a Daffodil Sticker in Procreate
- Draw a Baby Duck in Procreate
- How to Make Your First Digital Sticker in Procreate (In 10 Minutes!)
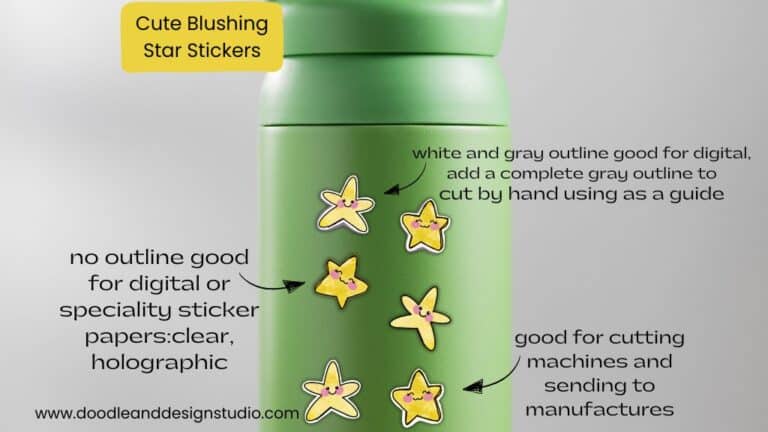
- 3 Easy Outline Effects in Procreate That Make Your Stickers Pop
Procreate Tools, Ideas & Tips
- Easy Procreate Sticker Ideas
- Sticker Making Tips in Procreate
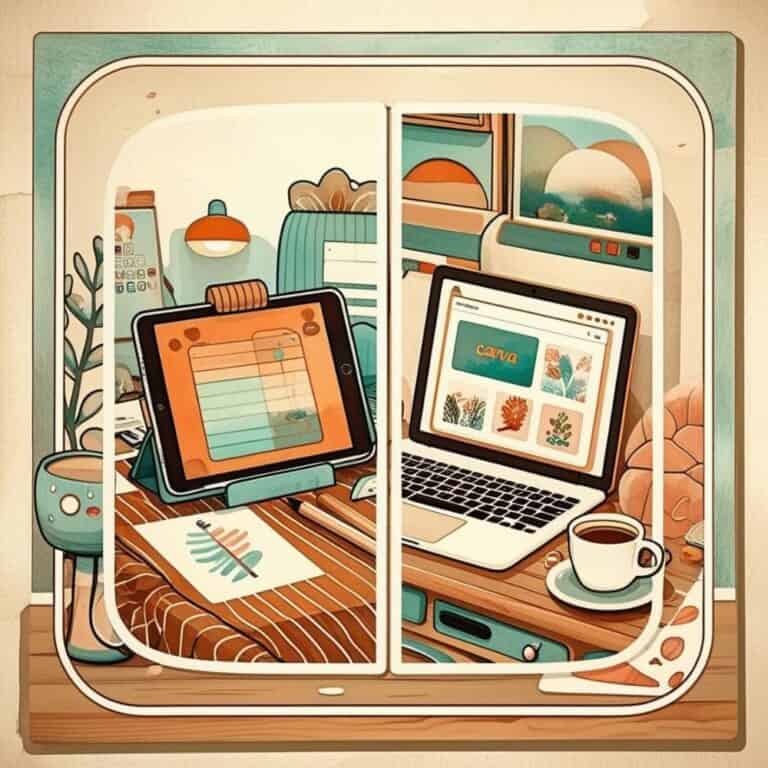
- Procreate vs Canva for Sticker Design
- How to Design Stickers
- Procreate Tools for Sticker Design: The Beginner’s Guide for Burnt-Out Moms
- Using Layers for Stickers in Procreate
- Clipping Masks For Procreate Stickers (with Less Stress and More Fun!)
- Best Canvas Size for Procreate Stickers (Beginner Guide)
- Best Procreate Brushes for Stickers (Free & Paid)
- Resizing Stickers in Procreate: The Busy Mom’s Guide to Sanity, Success, and Not Losing It
- Procreate Color Palettes for Stickers, Effortless Sticker Color Magic
- Eraser Tool Tips for Procreate Stickers (That Even Exhausted Moms Can Master)
I have also created an entire Procreate Starter Kit with a complete sticker file so you can see exactly how I made it!
Make sure and grab your favorite Pinterest Pin and Save it to your Digital Art Pinterest Board